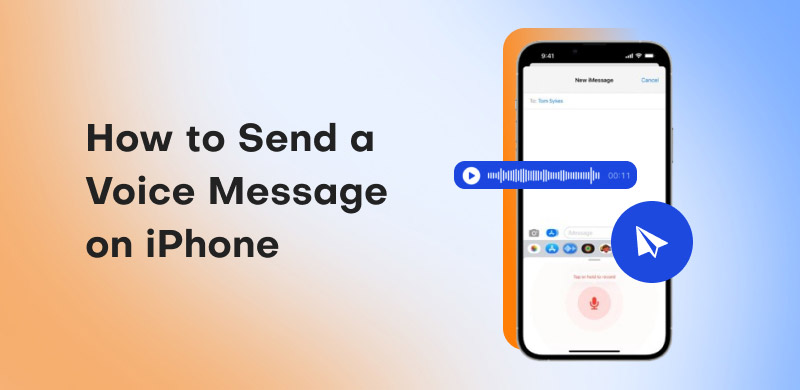
Simple Way on How to Send a Voice Message on iPhone
Nowadays, when communicating with someone, especially those in other locations, the best option is to send a message via text, Messenger, iMessage, or similar platforms. However, we can't ignore that sending a long message, especially on your iPhone, is time-consuming because you have to enter the entire message. Thankfully, you no longer have to do that. One of the best features in your messaging app is voice messaging. This feature lets you send your message by speaking, making communication faster and easier. The only challenge is that some users are unfamiliar with the feature. With that, if you want to learn how to send a voice message on an iPhone, read this tutorial. We will teach you the best method. You will also learn how to listen and reply to an audio message effectively. To learn everything, read this post immediately.
Part 1. How to Create and Send Voice Messages on iPhone?
Want to learn how to send a voice or audio message on an iPhone? Creating and sending a voice message is straightforward. Simply launch your iMessage or Voice Memos app, and you are ready to go. The best part here is that anyone can do it. To start the process, follow the simple steps below.
Send a Voice Message on the iMessage App
iMessage is a built-in app for sending messages to other people. The application is easy to navigate, so you can send messages without any issues. With its Voice Message feature, you can send a voice message. Follow the steps below to begin sending your voice messages.
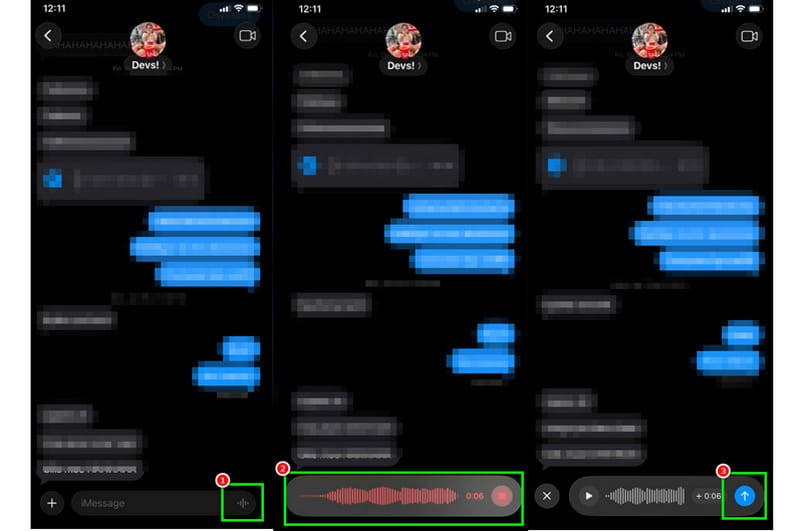
Step 1. Open your iPhone and open the iMessage app. Then, select the person or contact you want to send the voice message to.
Step 2. After that, you will see the Voice Message feature below. Press and hold it to start speaking the message you want to send.
Step 3. Once done, click the Send or Arrow button to begin sending the voice message.
Send a Voice Message Using the Voice Memos App
Besides iMessage, you can also use the Voice Memos application to send a message. This app is ideal if you want to record your voice before sending it to the recipient. We appreciate that you can use all the functions easily, making it suitable for all users. You can also share the recorded audio across platforms, including AirDrop, iMessage, Mail, and more. To begin the process, see the steps below.
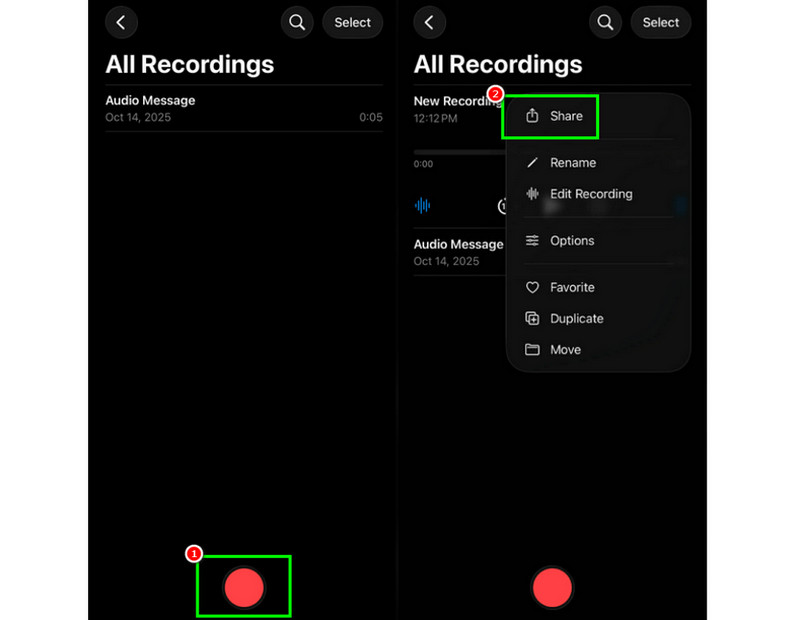
Step 1. Open your Voice Memos app on your iPhone. Then, click the Record button below the user interface.
Step 2. You can start recording your voice. Tap Stop to stop the recording.
Step 3. After recording, click the three-dot menu and select Share. With that, you can send your voice message on various platforms.
Now you learn how to send a voice text on an iPhone. If you are looking for an effective way to send your voice message, always follow the procedure above.
Part 2. How to Listen and Reply to an Audio Message on iPhone
Do you want to learn how to listen to the voice message that has been sent to you? Well, the process is simpler than sending a message. See the steps below and learn how to listen and reply to the audio message on the iPhone.
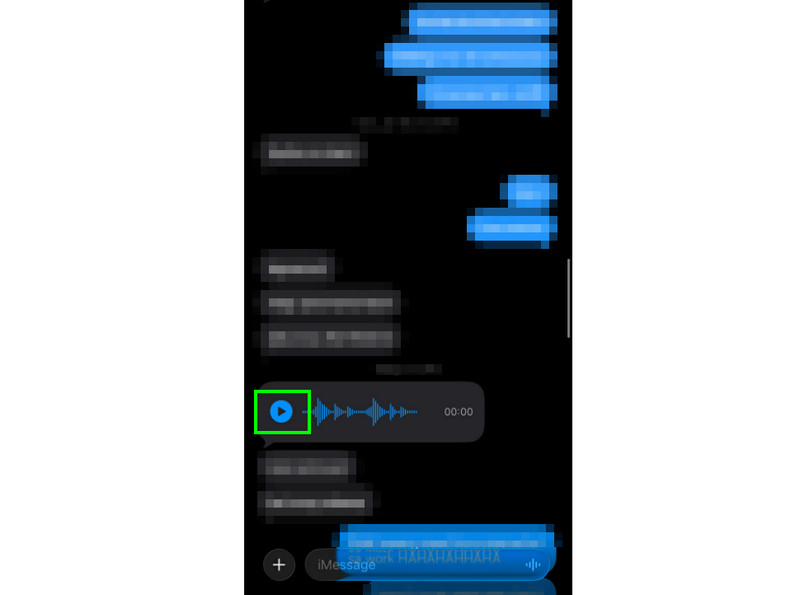
Step 1. After receiving the voice message, all you need to do is tap the Play button. After listening, the message will stop.
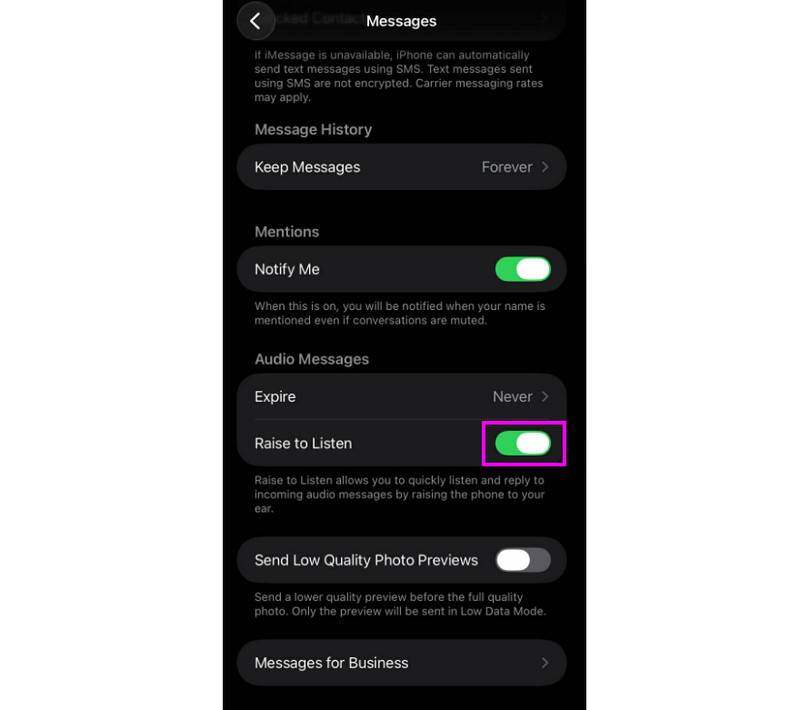
Step 2. Another option is to access the Raise to Listen feature. To access this feature, open the Settings app and go to Apps > Messages section.
Step 3. Now, start turning on the Raise to Listen feature. Once done, you can proceed to the sent voice message and place the phone to your ear to listen.
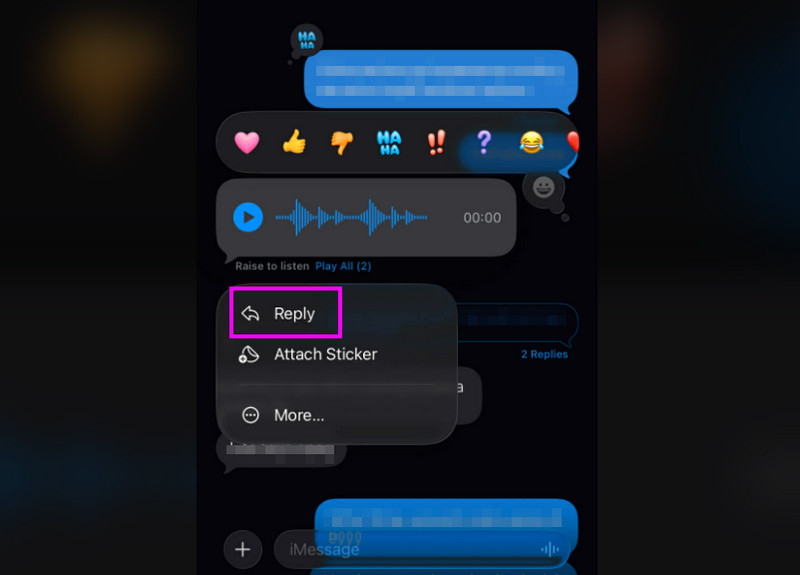
Step 4. To reply to the voice message, press and hold the message. Then, tap the Reply button to start replying.
With this method, you can listen to the voice messages you received on your iPhone. You even learned how to reply, allowing you to enjoy listening to and responding to messages.
Part 3. How to Save iPhone Voice Messages
After receiving a voice message, you can save it for record-keeping or collection. If that is the case, there are several ways to save voice messages effectively. To learn all the savings processes, use the recommended methods below.
Method 1. Save iPhone Voice Messages by pressing the Keep button
The first step to save the voice message is to press and hold the Keep option. This function will appear while listening to the voice message. With this method, you can permanently save and retain the message. This method is ideal if voice messages you send on your iPhone are being deleted automatically.
Method 2. Save Voice Message on iPhone via Settings
Another way to save the voice message is to configure the settings correctly. As we all know, if the Expire function is set to After 2 minutes, the voice message will be automatically deleted. To save all voice messages, open the Settings app. Then, go to the Apps > Message section. Once done, scroll down, go to the Expire section, and select Never. With that, the voice message won't disappear on your message app.
Method 3. Save Voice Message on Voice Memos
You can also save the voice message on Voice Memos. This process is ideal if you want to keep the message in your files. To begin the savings process, follow the steps below.
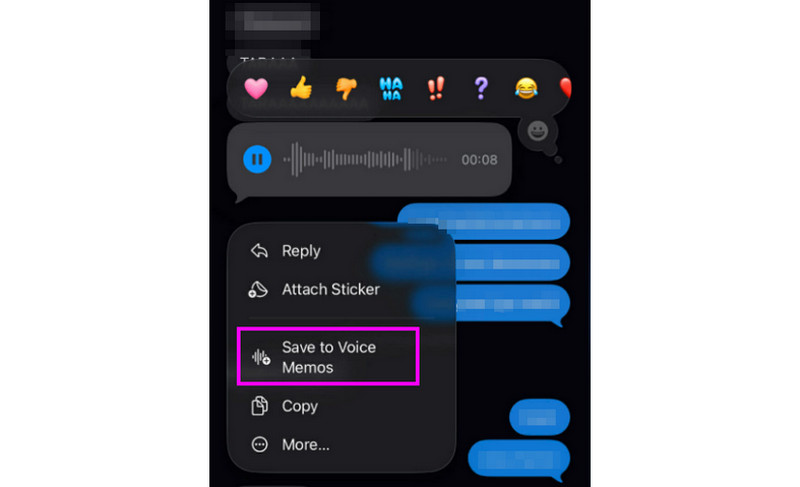
Step 1. After receiving the voice message, press and hold it. Then, various options will appear on your phone.
Step 2. Press the Save to Voice Memos option. Then, enter the file name and save it.
Step 3. You can now go to the Voice Memos app to view and play the saved voice message.
Saving the voice message is ideal if you want to listen to the messages unlimitedly. If you want to keep a record of the voice messages you've sent on an iPhone, always use the methods above.
Part 4. Disadvantages of Using Audio Messages on iPhone
Sending a voice/audio message on an iPhone is an effective way to communicate with others. However, you should be aware that there are also disadvantages you may encounter. Some of them are:
- • Unstable Accuracy of Dictation – If you rely solely on the voice message feature, you may sometimes send an unclear message due to background noise, reducing its reliability.
- • Lack of Privacy – Messages may be played aloud in public places, exposing sensitive information.
- • Inconvenient Receivers – Receivers without earphones may struggle to hear the message, especially when the phone’s speaker is no longer working well.
- • Hard to Search – The challenge is that you cannot search the voice message. You must manually retrieve the voice message.
- • Easy to Expire – The sent voice message can easily expire if you didn’t set up the Message setting.
- • Poor Cross-Platform Compatibility – A voice message sent by an iPhone can only be played on Apple devices. It means you cannot play the voice message on an Android device.
- • Low Communication Efficiency – A lengthy voice message is harder to skim than text.
- • Reliance on Network Stability – Sending a voice message requires a fast and stable internet connection.
Part 5. FAQs about How to Send a Voice Message on iPhone
Q. Why can't the recipient receive my voice messages?
A. There are various reasons why they can't receive your messages. If your recipient is using a non-Apple device, they cannot receive your voice messages. Plus, there might be an issue with the internet. Always ensure you have a stable, reliable internet connection when sending a message.
Q. Where do audio messages save on iPhone?
A. You can save voice messages on various platforms. First, if you set up the Settings and select Never in the Expire section, the voice messages will remain on the thread. Additionally, you can save the audio to various platforms. You can save it on Voice Memos, Emails, Notes, and more.
Q. Is it easy to send a voice message?
A. Definitely, yes. Sending a voice message is a simple task. Open your message app, select your recipient, and tap and hold the voice message icon to start recording.
Conclusion
There you have it! If you want to learn how to send a voice message on an iPhone, you can use all the methods from this tutorial. You also learned how to listen, reply, and save voice messages effectively. Therefore, to learn more about the topic, feel free to read this article anytime!
Ethan Carter
Ethan Carter creates in-depth content, timely news, and practical guides on AI audio, helping readers understand AI audio tools, making them accessible to non-experts. He specializes in reviewing top AI tools, explaining the ethics of AI music, and covering regulations. He uses data-driven insights and analysis, making his work trusted.